Adding a SQL Server login as a sysadmin using SQL Server Management Studio (SSMS) is a common task in database administration, especially when setting up new users who need high-level access. Here’s a step-by-step guide to do this:
- Open SSMS and Connect to Your Server:
- Launch SQL Server Management Studio (SSMS).
- Connect to the desired instance of SQL Server.
- Navigate to the Security Folder:
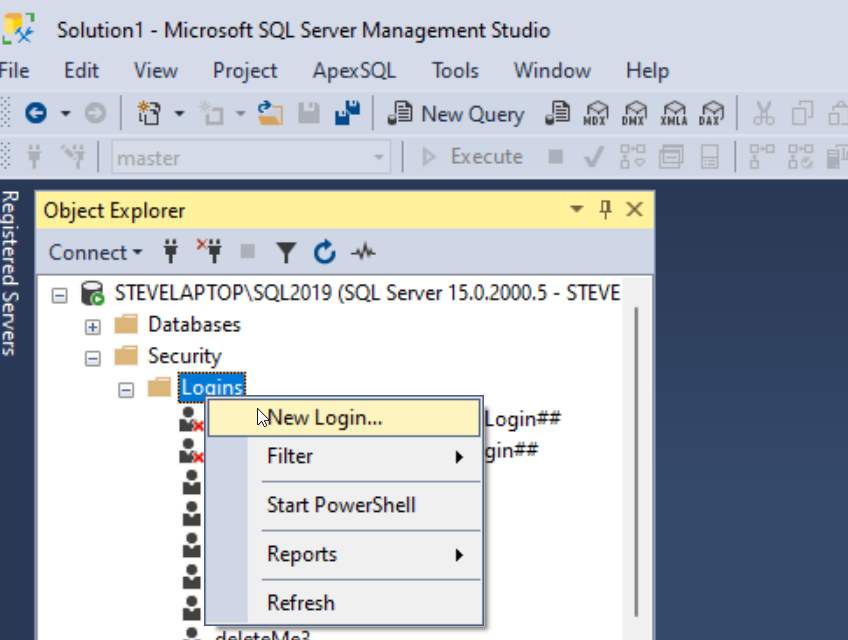
- In the Object Explorer, expand the server where you want to create the new login.
- Expand the ‘Security’ folder.
- Create a New Login (if needed):
- Right-click on the ‘Logins’ folder and select ‘New Login…’.
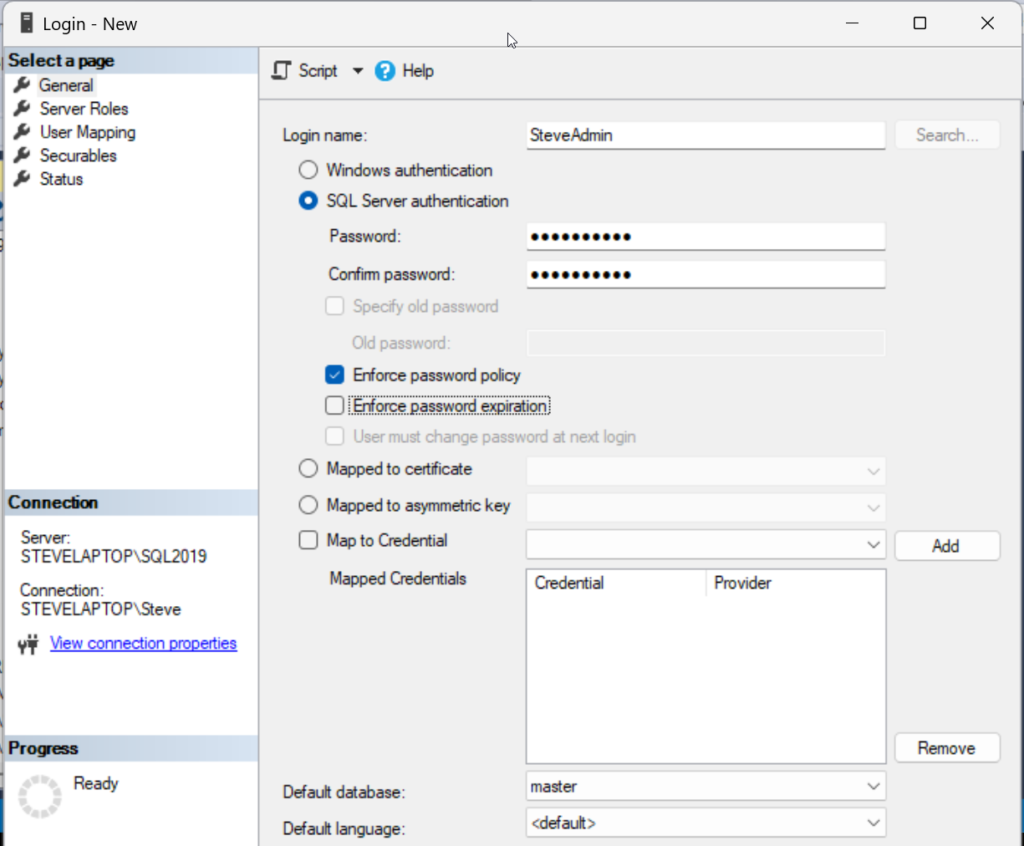
- In the ‘Login – New’ dialog, enter the new login name.
- Choose authentication type, in this example we will use SQL Server authentication, and will need to set the passwrod.
- Set the default database, if necessary.
- Assign Sysadmin Role:
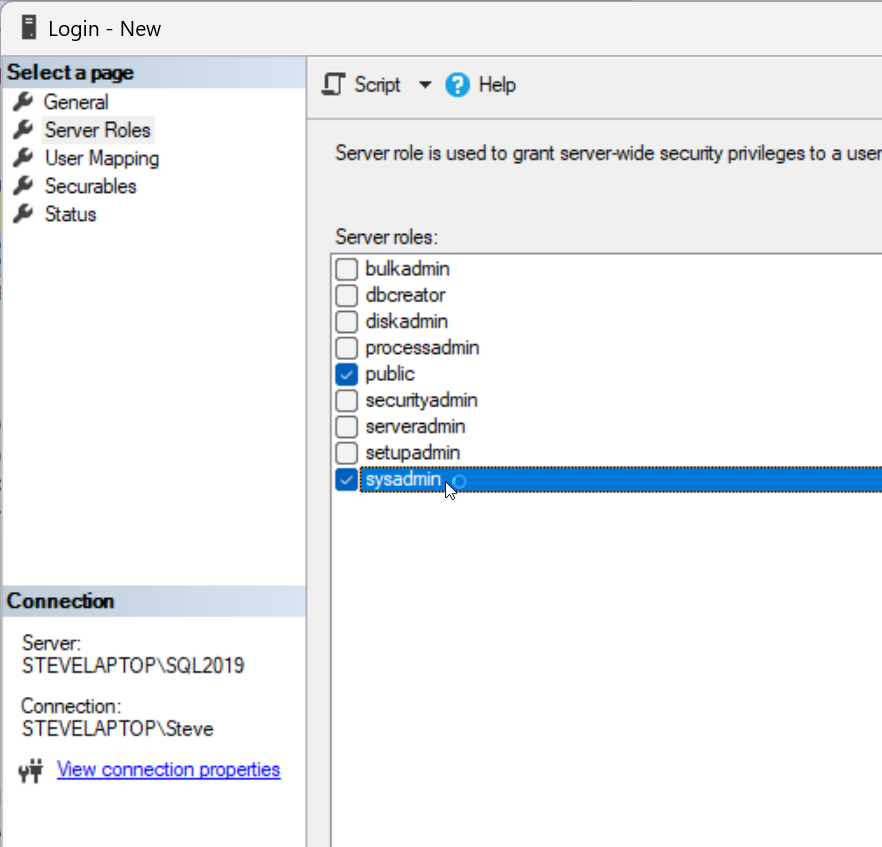
- In the same ‘Login – New’ dialog, select the ‘Server Roles’ page on the left.
- Check the box next to ‘sysadmin’. This role grants the highest level of privileges on the SQL Server instance.
- Complete the Process:
- Click ‘OK’ to create the login with sysadmin privileges.
Remember, the ‘sysadmin’ role grants very broad permissions and should only be assigned to trusted individuals, as it allows virtually unrestricted access to all aspects of the SQL Server instance.
Steps Review:


Also, it’s essential to regularly review and manage your SQL Server’s security settings to ensure your system’s safety and efficiency. Tools like Database Health Monitor can assist in monitoring your server’s security configuration, as well as performance and other critical aspects. For more advanced SQL Server training, including security best practices, consider enrolling in Stedman’s SQL School classes at https://Stedman.us/school.
More from Stedman Solutions:

Steve and the team at Stedman Solutions are here for all your SQL Server needs.
Contact us today for your free 30 minute consultation..
We are ready to help!
