I have worked with some agile product owners who when the write user stories, the like to go epic on the acceptance criteria, in fact when you read their acceptance criteria it almost looks like a complete functional specification crammed in to acceptance criteria. Other product owners simply write a user story and expect that all acceptance criteria will be discussed, or simply absorbed. One of my favorites recently was a comment heard from a developer something like “The user story says to create a modal dialog, but there are no details on what should go in the dialog”. This is a sign that the user story was poorly written and lacking the appropriate details, or perhaps that something got lost along the way.
Acceptance criteria are an important part of any user story. Without acceptance criteria you are asking the developers to freelance and create whatever they want.
When should acceptance criteria be created?
Acceptance criteria should be specified by the product owner at any point prior to sprint planning, or prior to the point in time that any estimating is being done on the story.
Let’s take the following user story as an example.
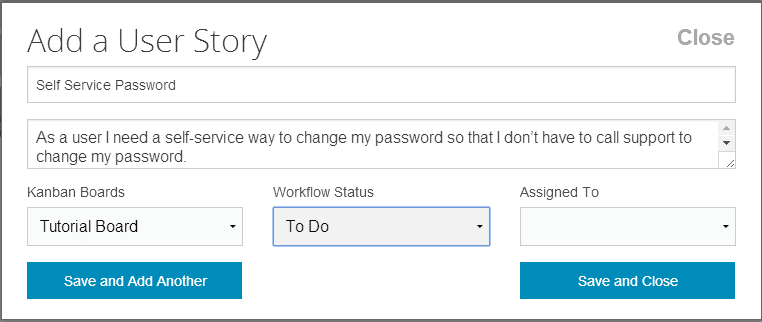
As a user I need a self-service way to change my password so that I don’t have to call support to change my password.
Acceptance criteria:
- Verify there is a modal dialog.
Now this isn’t good enough, so let start breaking it down. This might actually occur in a backlog grooming with a more novice product owner being guided by the scrum master, developers or testers. More proficient product owners will be able to do this on their own naturally as they write user stories.
Keep in mind that a more experience team with a more experienced product owner may have certain standard acceptance criteria that they know are always being handled.
I would start by adding the user story in Uzility as shown here.
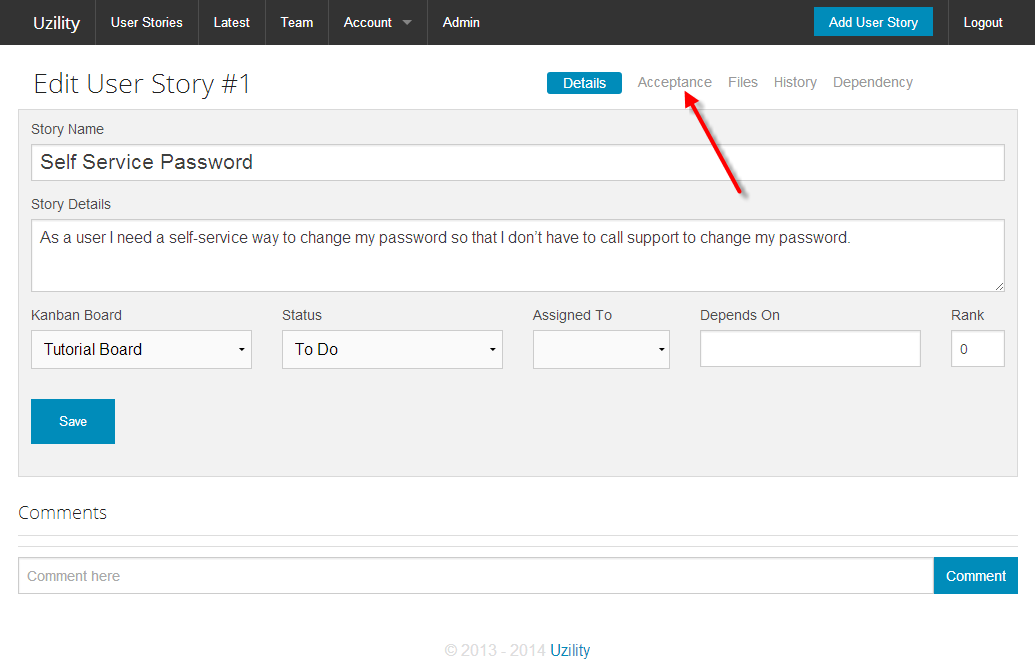
Once the user story was added, it will look something like this from the use story grid.
Now to start with the acceptance criteria. Double click the story when it opens in edit mode, click the Acceptance tab.
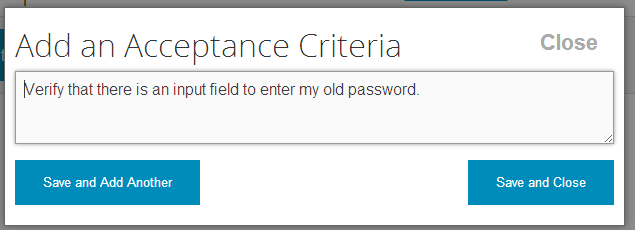
You will be taken to the empty acceptance criteria page where you can click the “Add Acceptance Criteria” link to start adding criteria. Keep in mind that there are many different formats for adding acceptance criteria.
For the different formats, some people prefer the “Given, When, Then” format, other prefer the “Verify”, and some just go free form, or a combination of the above.
For instance
- Given the reset password dialog is shown, when the user clicks the “save” button then error messages will be shown if the passwords don’t meet the minimum password strength.
- Verify that there are 3 input fields shown on the change password screen. The first prompts for the old password, the second prompts for the new password, and the third prompts for the new password to be entered again.
Acceptance criteria tend to sometime grow too large. For instance the verify… criteria above could be reworded as 3 or more specific criteria for instance.
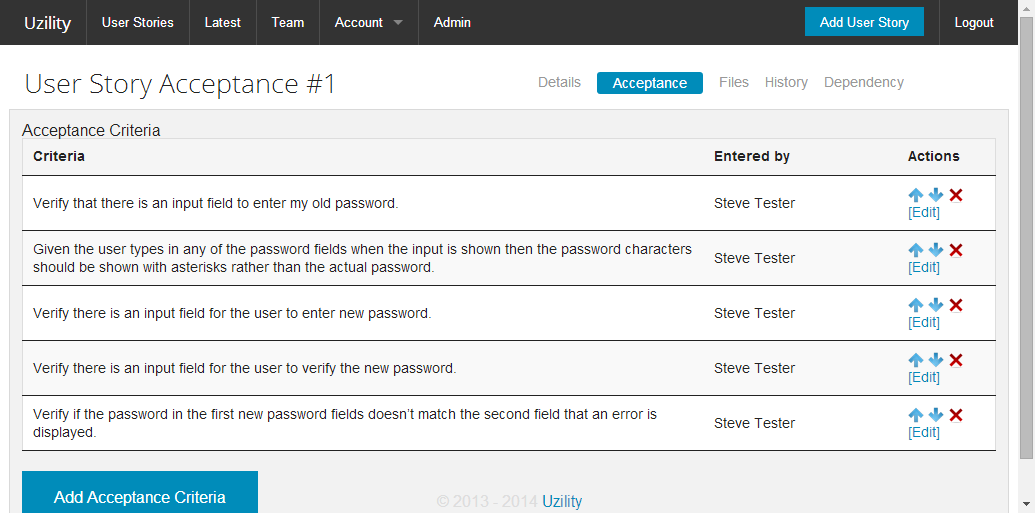
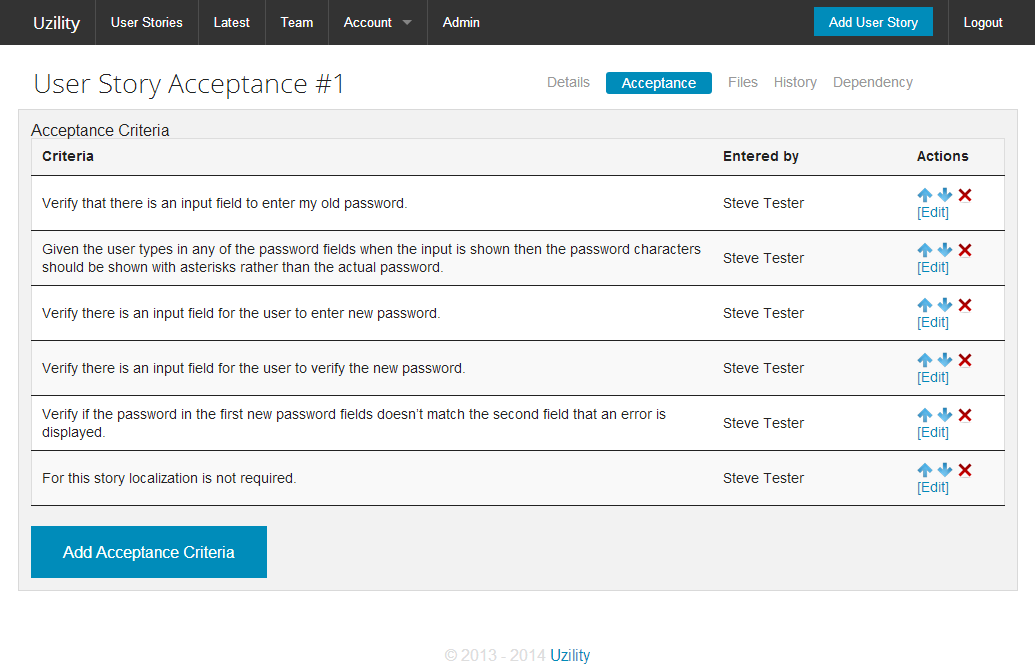
- Verify that there is an input field to enter my old password.
- Given the user types in any of the password fields when the input is shown then the password characters should be shown with asterisks rather than the actual password.
- Verify there is an input field for the user to enter new password.
- Verify there is an input field for the user to verify the new password.
- Verify if the password in the first new password fields doesn’t match the second field that an error is displayed.
This looks pretty good, but what about other areas? Does this dialog need to have a help page created for it, if so can the help page be a different user story. Does this dialog need to be localized so that it can be translated to different languages, this may need to be specified it the acceptance criteria.
At this point, let’s assume that we are good with the acceptance criteria, and we are going to start adding it into the system.
Enter the first acceptance criteria, click the “Save and Add Another” button, followed by all the remaining acceptance criteria.
Once the acceptance criteria has been filled out it will look something like this.
Once my favorite descriptions of a user story is “a user story is just a conversation waiting to happen”. Meaning that you do not need to write a detailed specification here, you simply need to write down enough so that the conversation can be had between the developers, testers, product owner and scrum master in order to be sure that everyone understands what is being asked for.
That conversation waiting to happen often occurs in spring planning. Let’s say the above list of acceptance criteria goes into sprint planning, the product owner presents the story, the team discusses it and asks questions, for instance someone asks “what about localization”, and the product owner replies “this doesn’t need to be localized”. An additional acceptance criteria could be added stating “For this story localization is not required”.
Depending on the experience of the team and the trust between the product owner and the team, it may be enough to not worry about documenting the acceptance criteria to not do localization, but if you want to its easy enough to add.
When you return to the user story Kanban board view, the card will show an A:6 indicating that 6 acceptance criteria have been specified for this story. You can just click on the “A:6” section and be taken directly to the acceptance criteria.
Now that the team has worked out all the details on this user story it is ready to be estimated.
See Also:
- Point Estimating
- User Story
- Scrum Master
- Product Owner
- Uzility
More from Stedman Solutions:

Steve and the team at Stedman Solutions are here for all your SQL Server needs.
Contact us today for your free 30 minute consultation..
We are ready to help!
