If you are a pro at SQL server I am sure you already know how to backup a database, but for someone who is new to it, things can be a bit overwhelming and confusing. This is especially confusing with the number of options that Microsoft has added into SQL Server Management Studio over time.
We get called in quite often to help with repairing a corrupt database, or help getting a database back online. When we are done with those tasks we usually recommend taking a backup to be sure we have something that you can get back to. Also we recommend the backup before moving a SQL Server database to a new server.
Here is the quick and easy way to take a backup in SQL Server Management Studio.
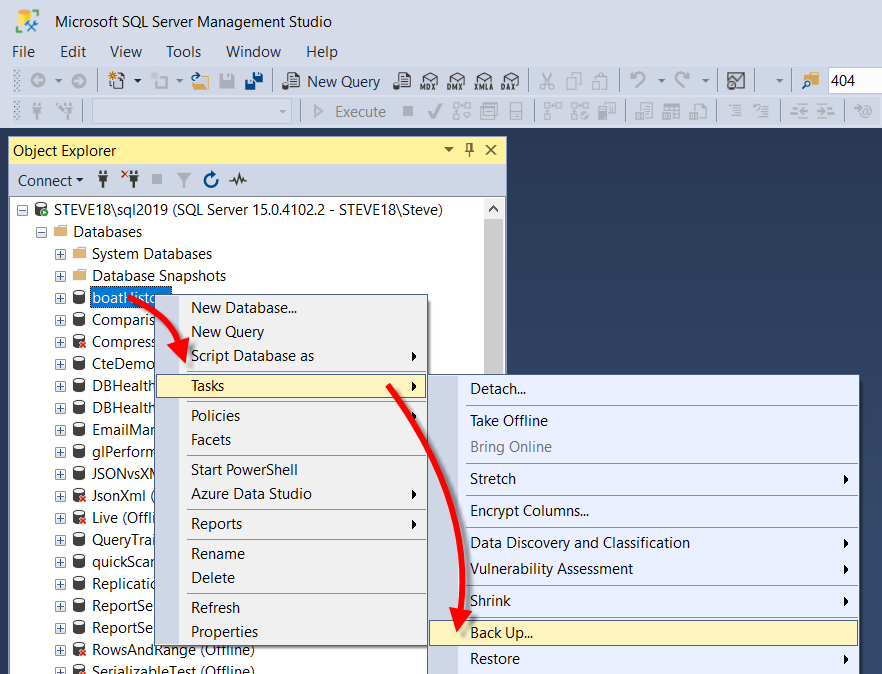
Lets start by right clicking on the database name in SQL Server Management Studio (SSMS). Then select tasks from the popup menu, then from the second menu select Back Up…
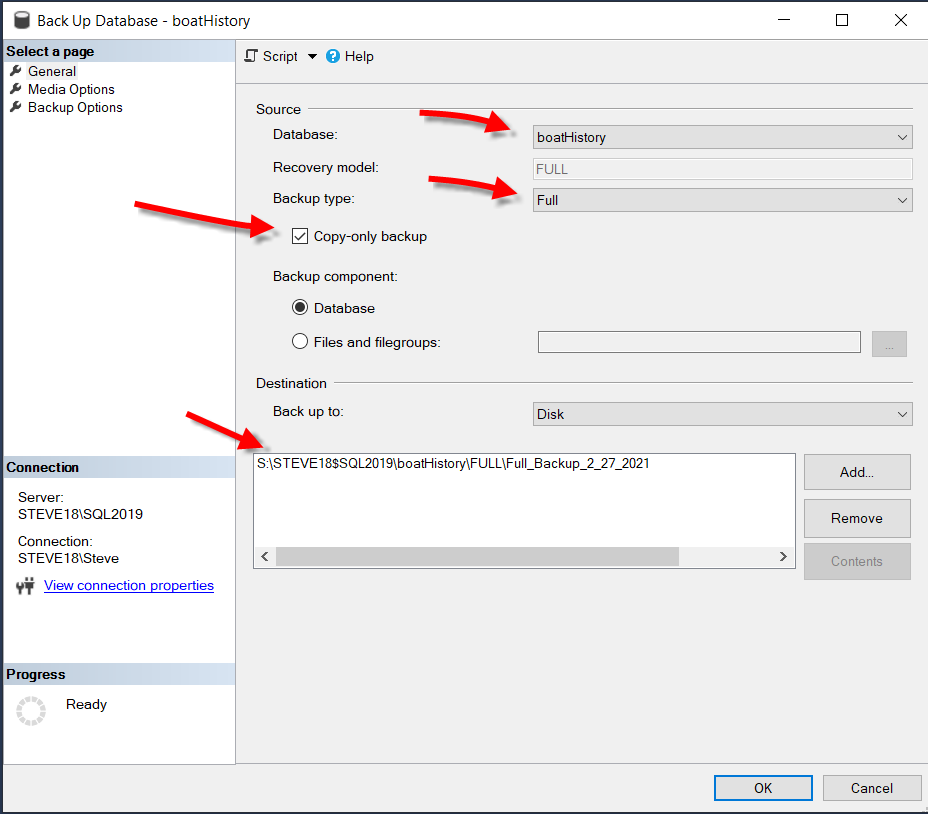
You will be taken to the Back Up Database screen where you will want to confirm the database name being backed up and select a “Full” backup. Then you will want to selec the checkbox next to copy-only backup so that this backup does not break the restore chain for other backups that may be running. After that check the path it is backing up to and if it is not where you want the backup to go, remove the path and add a new path.
We strongly recommend getting the backup off the SQL Server, so if you can backup to a network location, or external storage that you can take away with you then that is even better.
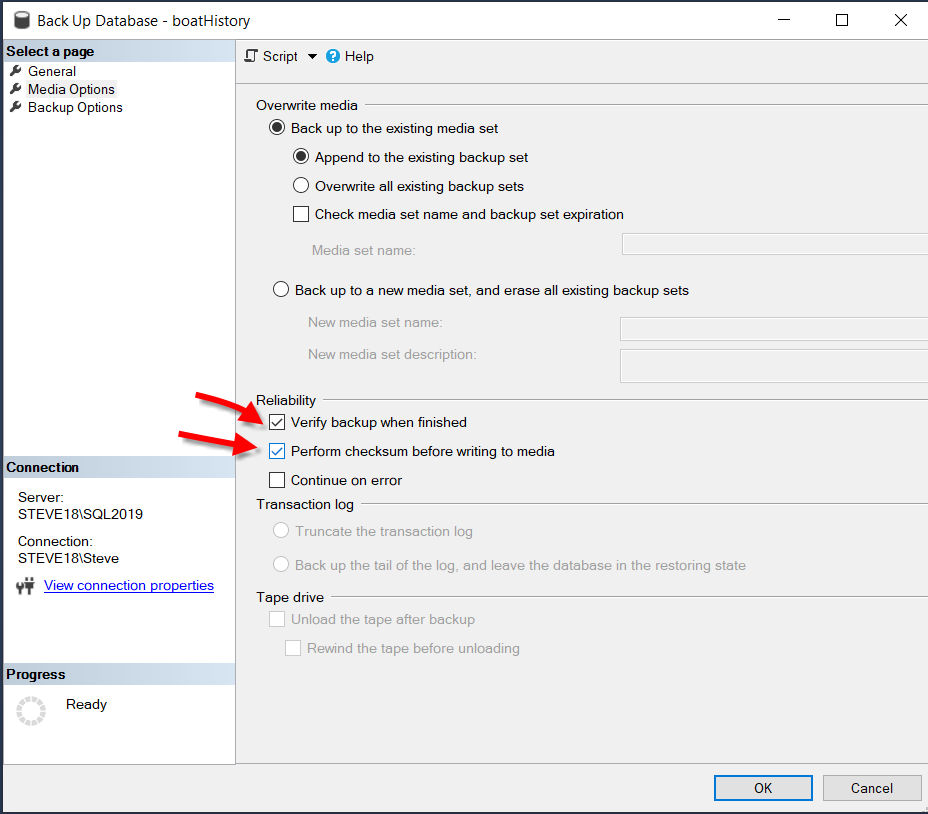
On the second page “Media Options”, you will want to click the checkboxes for “verify backup when finished”, and “perform checksum before writing media”, both of these are good to help confirm you have the most reliable backup.
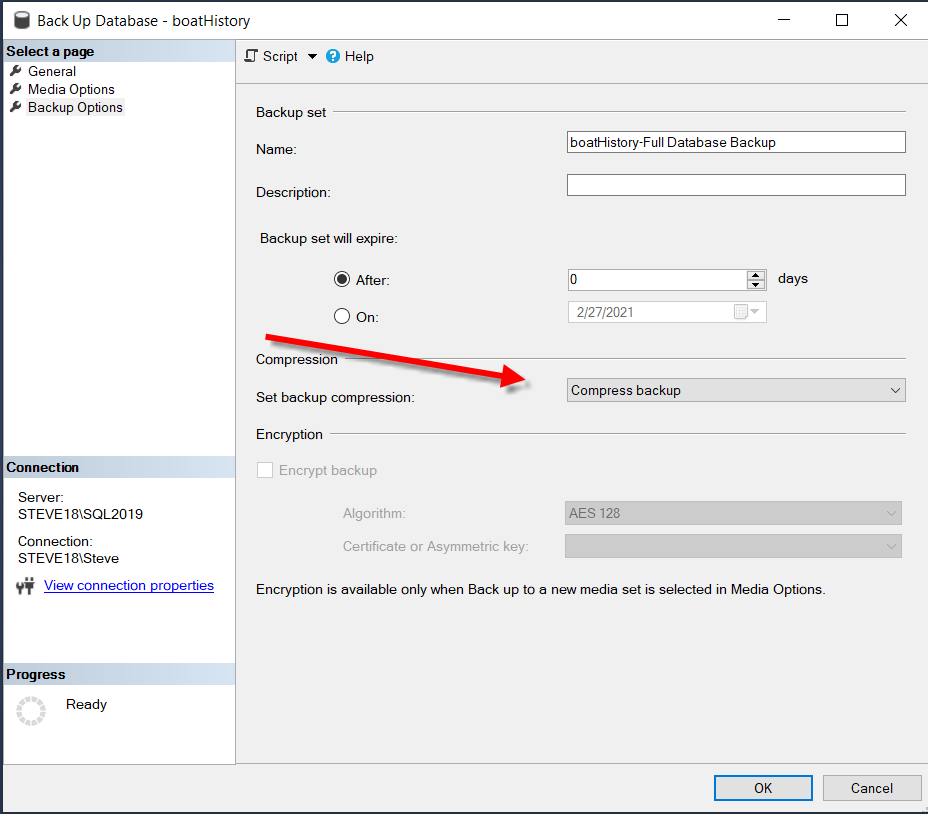
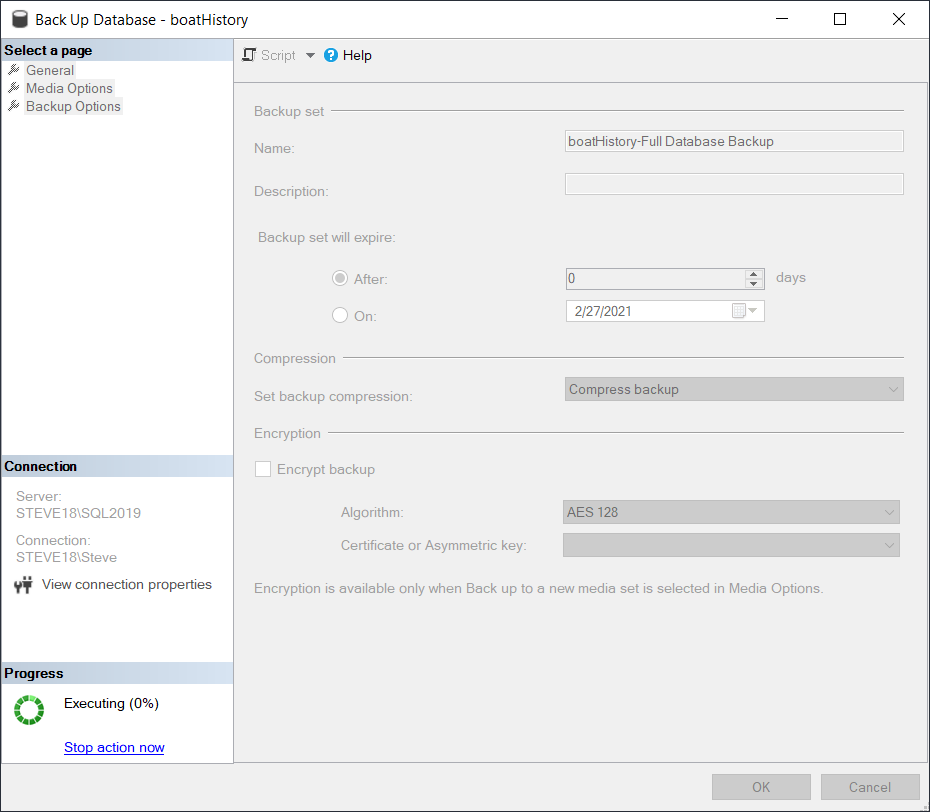
On the third page, you should choose to compress your backup, unless you are on a version of SQL Server that doesn’t support compression. If you don’t know just choose to compress the backup and if you get an error about compression not supported, then do it again without the compression.
Compressing the backup speeds up the write time and the read time of that backup file, and also takes up less space on disk.
Once you have filled out all 3 pages then click the “OK” button and you can watch the percentages progress in the bottom left corner.
When complete, if all goes well, you will get a message that says the backup completed successfully.
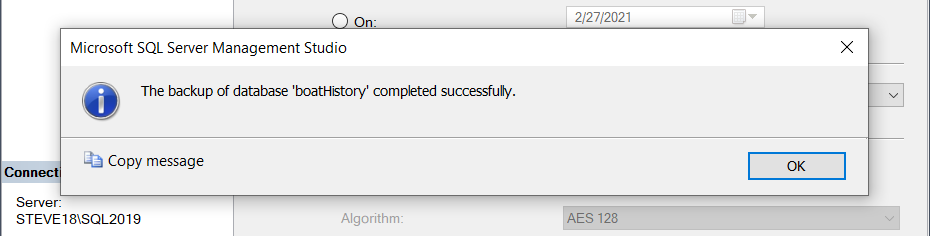
You should then go and confirm that the backup file exists on disk where you think you saved it and make sure that you copy it somewhere safe.
Repeat this for each database that you want to back up.
That is the quick and easy steps to back up your database with SQL Server Management Studio.
Have a great day!
More from Stedman Solutions:

Steve and the team at Stedman Solutions are here for all your SQL Server needs.
Contact us today for your free 30 minute consultation..
We are ready to help!